Join Discord
Once Human Game

Once Human: Starting/Intermediate Game Guide

Master the post-apocalyptic world with our comprehensive strategies, tips, and walkthroughs

Updated: August 22, 2025
25+ min read
Jade Vanity Gaming

Welcome to our comprehensive guide for Once Human, the open-world survival game set in a post-apocalyptic world transformed by a mysterious substance called "Stardust." This guide covers everything from basic survival tips to advanced strategies, helping both newcomers and veterans navigate the dangerous world and master its complex systems.

Whether you're struggling with resource management, looking for the best weapons, or need help defeating challenging bosses, we've got you covered. Our guide is regularly updated to reflect the latest patches and game changes, ensuring you always have the most current information.

Getting Started

Once Human drops you into a harsh post-apocalyptic world with minimal guidance. Here's everything you need to know to survive your first few hours in the game.

Character Creation & Classes

When creating your character, you'll have choices between different classes, each with unique attributes and skills:

  • Chef - Instead of being limited by recipes, Chefs can freely combine ingredients to create unique dishes with dynamic effects. They have a portable cooking facility and the ability to stack dish effects.
  • Gardener - This class focuses on manipulating the environment to grow crops, including biomechanical ones, which can also be used in combat. They can gather resources, improve the environment, and craft items to support their crops.
  • Beastmaster - Beastmasters command pets to gather resources and dominate in battle. They can utilize a whistle to command pets, change them in their territory, and manipulate their genetics for enhanced abilities and drops.
  • Freelancer - This option doesn't offer unique abilities but provides a class change item for later use, allowing players to experiment and potentially switch classes as the system evolves.

Your class choice affects your early game experience, but as you progress, you'll be able to develop skills across all specializations.

Once Human Character Classes
The three character classes in Once Human, each with unique starting gear and abilities.

First Steps

Your first priority should be gathering basic resources and crafting essential tools. Follow these steps when you first spawn:

  1. Gather Plant Fiber from bushes and Wood from small trees or branches on the ground
  2. Craft a Basic Axe which requires 2 Wood and 2 Stone
  3. Find a water source to gather dirty water, then press T to create a small camp to cook the water and craft purified water
  4. Look for Berry Bushes/orange trees for immediate food
  5. Craft a Basic Shelter before nightfall

The early game is about survival and resource gathering. Don't venture too far from your starting area until you have basic equipment and supplies.

Beginner Tip

Press Q to scan your surroundings, highlighting important resources and potential threats. This ability has a cooldown but is invaluable for finding critical materials.

UI & Controls

Understanding the game's interface is crucial for efficient gameplay. Here are the key elements:

Control Action Notes
WASD Movement Hold Shift to sprint (consumes stamina)
Space Jump Double-tap to use V, your friendly feathered companion you meet at the beginning of your game. This will use stamina however it will allow you to safely land from various heights.
Ctrl Roll Used for dodging. (higher stamina usage)
F Special Action Context-sensitive action based on situation
I Inventory Access your personal inventory
M Map Open world map
C Character Menu View stats, skills, and progression
B Crafting Menu Access crafting recipes and building options
Q Scan Highlight resources and enemies
1-6 Hotbar Items Quick access to equipped items and weapons

Basic Survival Tips

Surviving in Once Human requires managing multiple systems simultaneously. Here's how to stay alive in the early game.

Health & Stamina

Your health and stamina are your most critical resources:

  • Health - Decreases when taking damage from enemies, falls, environmental hazards, hunger, thirst, or extreme temperatures
  • Stamina - Used for running, jumping, attacking, and other physical actions

Health regenerates slowly over time if you're well-fed and hydrated. Stamina regenerates much faster but can be depleted quickly during combat or while sprinting.

Pro Tip

Craft Medicinal Herbs early for emergency healing. They can be found near water sources and in forested areas. Considered them as your earliest form of first aid before you unlock bandages, healing kits, or cooked recovery foods.

Hunger & Thirst

You'll need to manage your hunger and thirst meters to survive:

  • Hunger - Decreases over time, faster when performing physical activities
  • Thirst - Decreases more rapidly than hunger, especially in hot environments

When these meters get low, your health will begin to decrease. If they reach zero, you'll take continuous damage until you eat or drink.

🌱 Starting Essential Foods

  • Berries - Easy to find but provide minimal nutrition
  • 🫐 Blueberries (very common in starter zones)
  • 🍒 Hawthorn Berries Provide small Hunger + Hydration restoration. Usually the very first food source you’ll find.
  • Fruits
  • 🍎 Apples (fall from wild apple trees)
  • 🍌 Bananas (less common in starter areas but found in wild spawns)
  • 🍊 Oranges (one of the very first starting foods you will find and have a mini-quest for)
  • Vegetables
  • 🥔 Potatoes (grow in wild patches and can be farmed early)
  • 🥬 Cabbage (another common starter veggie)
  • 🍄 Mushrooms (common on forest floors)
  • 🍖 Meat - Obtained by hunting animals, must be cooked to avoid food poisoning
  • 🎣 Fish - Caught in lakes and rivers, a good source of protein
  • 🥫 Canned Food - Found in abandoned buildings, long shelf life

🫗 Water Sources:

  • 🚤 Rivers & Lakes - Must be purified to avoid contamination
  • ⛲Rain Collectors - Can be crafted to gather clean water
  • 🥤 Bottled Water - Found in abandoned buildings and can be later crafted.
Warning

Drinking unpurified water or eating raw meat has a high chance of causing food poisoning, which drains health over time and causes stamina penalties.

Weather & Sanity

The environment in Once Human can be just as deadly as the mutated creatures:

Weather Effects:

  • Rain - Reduces visibility and makes surfaces slippery
  • Thunderstorms - Lightning can strike players in open areas
  • 🌧️ Acid Rain -Environmental Hazard : Acid Rain is one of the anomalous weather conditions that can occur while exploring the world. It’s especially common in Polluted Zones (where Stardust Ore and other rare resources spawn).
  • Effects on Player: Gradually reduces health if you stay exposed for too long. Can damage armor durability over time. Often comes with reduced visibility, making exploration and combat riskier.
  • 💀 Sanity Zones You will see “The Great One’s presence is affecting your sanity.” - These zones are highly dangerous, increases mutation in the area and spawns powerful enemies.
  • The Great One is the cosmic-horror style entity at the heart of Once Human’s lore — basically the source of the Stardust contamination and the mutations in the world.

How Sanity Zones Work

  • Green / Safe Zone → No “Great One’s presence” effect since contamination is within your resistance.
  • Yellow Zone (Moderate Contamination) → You’ll see the Great One’s presence warning and start losing sanity faster.
  • Red Zone (Heavy Contamination) → The Great One’s presence is overwhelming: sanity loss spikes, and you risk debuffs like dehydration, stamina reduction, or even diseases.
Important

When your Sanity reaches 0, you trigger a Severe Insanity state: 🌲 The Tree Monster (a.k.a. “Great One’s Manifestation” / “Tree Horror”) What you’re seeing is not a normal mob — it’s a manifestation of the Great One’s presence that specifically hunts you when you’ve completely lost Sanity. Players often describe it as a giant tree-like monster that appears out of nowhere and chases you relentlessly. It can: Deal heavy damage if it catches you. Force you out of the contaminated zone or even cause death if you don’t escape. The creature isn’t a permanent world boss — it’s basically the game’s way of saying “You’ve lost all grip on reality, and the Great One is consuming you.”

Temperature:

  • Cold - Decreases stamina regeneration and eventually health
  • Heat - Increases thirst rate and can cause heat exhaustion

Crafting & Building

Crafting is a core mechanic in Once Human, allowing you to create tools, weapons, armor, and structures. Understanding the crafting system is essential for progression.

Crafting Basics

To craft items, you'll need:

  1. The required materials
  2. The appropriate crafting station (for advanced items)
  3. The recipe or blueprint (some must be found in the world)

Basic items can be crafted from your inventory menu (B key), while advanced items require specialized crafting stations like:

  • Supplies Workbench - What it does: This is the basic crafting station. You can craft tools, healing items (like Activators), ammunition, and various utility items.
  • Intermediate Supplies Workbench & Advanced Supplies Workbench - What they do: Upgraded versions of the basic Supplies Workbench. They offer improved functionality, such as faster crafting or access to higher-tier recipes.
  • Material Refineries (e.g., Furnace, Smelter, Electric Furnace) - What they do: These stations enable you to process raw materials into refined products. Examples include smelting gold/silver into ingots, producing gunpowder, or crafting special crystals.
  • Cooking Stations (Stove, Cooking Table) - What they do: Used for making foods. The basic cooking setup (like campfires or simple stoves) handles early recipes. Advanced cooking stations unlock more complex dishes with buffs.
  • Memetics - The Memetics menu is where you unlock all kinds of progression: weapons, tools, crafting stations, armor, building pieces, survival upgrades, etc.

Essential Early Game Crafting Recipes

Item Materials Crafting Station
🪓Basic Axe 2x Wood + 2x Stone Handcrafted
⛏️Basic Pickaxe 2x Wood + 2x Stone Handcrafted
🔱 Wooden Spear 5x Wood + 2x Plant Material Handcrafted
🔱 Stone Spear 5x Wood + 5x Stone Handcrafted
🏹 Bow 5x Wood + 2x Plant Material Handcrafted
🏹 Stone Arrows (x10) 1x Wood + 1x Stone Handcrafted
🌿 Medical Herb 1x Plant Material Handcrafted
🩹 Bandage 3x Plant Material + 1x Fiber Handcrafted
🔥 Campfire 10x Wood + 5x Stone Handcrafted → place in world
⚒️ Workbench 20x Wood + 10x Stone Handcrafted → place in world
🛏 Simple Bed 10x Wood + 5x Plant Material Handcrafted → place in world

Resource Gathering Tips

  • Wood - Use an axe on trees for maximum efficiency
  • Stone - Found on the ground or harvested from rock formations with a pickaxe
  • Metal Scrap - Salvaged from abandoned vehicles and machinery
  • Plant Fiber - Gathered from bushes and small plants
  • Medicinal Herbs - Look for distinctive glowing plants near water
  • Animal Parts - Obtained by hunting wildlife
  • Stardust - Rare resource found in contaminated zones, used for advanced crafting
Efficiency Tip

Upgrade your tools as soon as possible. Higher tier tools gather resources faster and yield more materials per node.

Base Building

Building a secure base is crucial for long-term survival. Here's what you need to know:

Base Location Considerations:

  • Resources - Proximity to wood, stone, and water
  • Safety - Distance from enemy spawn points and patrol routes
  • Terrain - Flat ground makes building easier
  • Strategic Value - Access to important locations or resources

Essential Base Components:

  1. Walls & Foundation - For protection from enemies and weather
  2. Storage Containers - To organize and store your resources
  3. Crafting Stations - For creating advanced items
  4. Bed - Allows you to set a spawn point
  5. Farm Plots - For sustainable food production
  6. Water Collector - For gathering clean water
Once Human Base Building
An example of a well-designed base.
Important

Bases require maintenance over time. Structures will decay if not repaired regularly, especially after weather events or enemy attacks.

Combat Strategies

Combat in Once Human is challenging and requires strategy. From mutated wildlife to hostile human factions and terrifying boss creatures, you'll need to master different combat approaches to survive.

Combat Basics

The combat system in Once Human combines traditional FPS mechanics with survival elements:

Key Combat Controls:

  • Left Mouse Button - Primary attack
  • Right Mouse Button - Aim/Block/Secondary attack
  • Shift + Space - Dodge (when unlocked)
  • R - Reload
  • Q - Quick Surroundings Scan
  • 1-6 - Switch weapons/tools

Combat Stats:

  • Damage - How much health you remove from enemies
  • Critical Chance - Probability of landing a critical hit
  • Critical Damage - Bonus damage on critical hits
  • Attack Speed - How quickly you can attack
  • Armor - Reduces incoming damage
  • Resistance - Protection against specific damage types

Enemy Types

Once Human features various enemy types, each requiring different tactics:

Mutated Wildlife

Mutated Wildlife

Transformed animals with increased aggression and new abilities. Common in forests and plains.

Threat: Low-Medium
Infected Humans

Infected Humans

Former humans corrupted by Stardust. Fast, aggressive, and often hunt in groups. Found in abandoned settlements.

Threat: Medium
Hostile Factions

Hostile Factions

Human survivors with advanced weapons and tactics. Control key locations and resources.

Threat: Medium-High
Stardust Aberrations

Stardust Aberrations

Heavily mutated creatures with unique abilities. Found in contaminated zones.

Threat: High
Mechanical Sentinels

Mechanical Sentinels

Automated security systems and drones protecting high-value facilities.

Threat: High
Boss Creatures

Boss Creatures

Unique, powerful entities with complex attack patterns and phases.

Threat: Extreme

Combat Tactics

Effective combat in Once Human requires adapting your approach to different situations:

Melee Combat Tips:

  • Use heavy attacks (hold left mouse button) to break enemy blocks
  • Time your dodges to avoid incoming attacks
  • Target weak points for critical damage (usually the head)
  • Use the environment to your advantage - funnel enemies through narrow passages
  • Conserve stamina by not spamming attacks

Ranged Combat Tips:

  • Aim for headshots whenever possible
  • Use cover to avoid return fire
  • Consider noise levels - loud weapons will attract more enemies
  • Keep distance from melee enemies
  • Craft and use different ammo types for specific situations

Stealth Approach:

  • Crouch to reduce visibility and noise
  • Use silenced weapons or bows for quiet takedowns
  • Observe enemy patrol patterns before engaging
  • Use distractions to separate enemies
  • Backstab attacks deal significantly more damage
Combat Tip

Different enemies have different weaknesses. Experiment with damage types (piercing, slashing, blunt, fire, etc.) to find the most effective weapons against specific foes.

Weapons & Equipment

Your arsenal in Once Human determines your survival chances. From makeshift tools to advanced weaponry, understanding your equipment options is crucial.

Weapon Types

Once Human features a diverse range of weapons across several categories:

Melee Weapons

Weapon Damage Type Speed Special Properties
Camping Knife Piercing Fast Good early-game option for quick attacks
Baseball Bat Blunt Medium Solid all-rounder; decent stagger impact
Long Axe Slashing / Heavy Slow High damage, AoE heavy swings, “Fortress Warfare” bonus when heavy-attacking
Frozen Northern Pike Slashing / Frost Medium Freezes enemies and creates a Frost Vortex; deals AoE frost damage and heals on hit
Stun Baton Blunt / Electric Medium High status and crowd-control: light strikes inflict Power Surge; heavy strikes chain shock to nearby enemies

Ranged Weapons

DE.50 – Wildfire (Pistol) Pistol Ammo Medium High damage, Bull’s Eye proc on body shots with correct gear
AWS.338 – Bingo (Sniper Rifle) Sniper Ammo Slow Extreme single-shot damage, Bull’s Eye effect specializes in body shots
KVD – Boom! Boom! (LMG) LMG Ammo Fast Massive magazine, explosive effect—excellent for crowd control and sustained fire
Silent Anabasis (Assault Rifle) Rifle Ammo Medium–Fast Applies Frost Vortex; provides healing and AoE frost damage
Critical Pulse (Crossbow) Bolts Slow Silent shots, bolts are retrievable; deals AoE lightning damage

Throwables & Explosives

  • Molotov Cocktail - Creates a fire area that damages over time
  • Pipe Bomb - Timed explosive with moderate damage radius
  • Smoke Grenade - Creates visual cover for stealth approaches
  • Stun Grenade - Temporarily blinds and stuns enemies
  • Proximity Mine - Explodes when enemies come near
  • Stardust Grenade - Releases stardust that damages and mutates enemies

Armor & Clothing

Protective gear is essential for survival, providing defense against damage and environmental hazards:

Armor Slots:

  • Head - Helmets and masks
  • Chest - Body armor and jackets
  • Hands - Gloves and gauntlets
  • Legs - Pants and leg armor
  • Feet - Boots and shoes

Armor Types:

  • Cloth - Minimal protection, high mobility, some environmental resistance
  • Leather - Balanced protection and mobility
  • Metal - High protection, reduced mobility
  • Composite - Advanced protection against specific damage types
  • Stardust-Infused - Special properties and resistance to stardust contamination

Different armor sets provide various bonuses and resistances. Consider mixing pieces for optimal protection against the threats you're facing.

Once Human Armor Types
The five main armor types in Once Human, each with unique protection values and special properties.

Consumables

Consumable items in Once Human offer a range of benefits, from temporary buffs and healing to survival aid, food, and more. Explore the categorized list below to maximize your gameplay experience:

Medical & Survival Items:

  • Antibiotics - Healing and survival
  • Adrenaline Shots - Healing, survival, and temporary boosts to damage and speed
  • Sanity Gummy - Restores sanity levels
  • Sanity Corrosion Capsule - Affects sanity levels (**Use with Caution**)

Food Items:

  • Goat Meat - Provides substantial nutrition and health restoration
  • Grapes - Restores health and hunger, offers minor antioxidant benefits
  • Corn - Provides balanced nutrition
  • Potato - Restores health and hunger, rich in carbohydrates
  • Blueberry - Provides antioxidants and a minor health boost
  • Orange - Restores health/hunger, rich in vitamins
  • Apple - Provides nutrition and a minor health boost
  • Fish (any type) - Excellent source of protein and significant health restoration
  • Beet - Provides nutrition and minor health benefits
  • Dried Orange - Concentrated nutrition and health boost
  • Seaweed - Rich in vitamins and minerals, restores health

Beverages:

  • Goat Milk - Hydrates and provides calcium
  • Malt Ale - Restores thirst, may have additional effects (**Consume in Moderation**)
  • Water - Essential for hydration

Animal Feed:

  • Grain Concentrate Feed - Nutritious feed for animals
  • Meat Pellet Feed - High-protein feed for animals

Special Items:

  • Transformation Cookie - **Unknown/Unique Effect** (**Use with Caution**)
  • Basic Health Activator - Restores 50% HP instantly
  • Adrenaline Shot - Increases melee damage and attack speed for 15 seconds
  • Quick Activator - Instantly restores stamina for sprinting or dodging
  • Stardust Activator - Inflicts AoE damage to nearby enemies and provides temporary shield

Herbs and Spices:

  • Mint - **Potential Health Benefits or Crafting Use** (**Research In-Game**)
  • Saffron - Valuable, potentially used in **Crafting or Trading**
  • Sage - May have **Health Benefits or Recipe Uses** (**Investigate In-Game**)
Inventory Management Strategy

To maximize your survival and progression in Once Human, maintain a balanced inventory. Assign essential items like water, nutritious food, healing supplies, and strategic buffs to your hotbar for quick access. Regularly review and adjust your inventory to ensure you're prepared for the challenges ahead.

Map & Locations

The world of Once Human is vast and diverse, with distinct regions each offering unique challenges and resources. Understanding the map is key to efficient exploration and survival.

Once Human World Map
The world map of Once Human.

Major Regions

The game world is divided into several distinct regions:

Green Valley

The starting region with relatively low danger. Features forests, small settlements, and gentle hills. Good for beginners to gather basic resources and learn game mechanics.

Key Locations:
  • Riverside Camp - Small survivor settlement with basic traders
  • Abandoned Farm - Good source of food and agricultural supplies
  • Hunter's Cabin - Contains hunting gear and weapon parts
  • Old Mill - Rich in mechanical components and tools
Resources:
  • Abundant wood and plant fiber
  • Common wildlife for meat and hides
  • Basic metals and components
  • Clean water sources
Threats:
  • Low-level mutated animals
  • Occasional bandit patrols
  • Minimal stardust contamination

Industrial Zone

A mid-level area featuring abandoned factories, warehouses, and industrial complexes. Rich in metal resources and technological components.

Key Locations:
  • Steel Mill - Excellent source of metal and tools
  • Chemical Plant - Contains rare chemical components
  • Worker's Housing - Scavenge for supplies and equipment
  • Research Facility - Find advanced technology and blueprints
Resources:
  • Abundant metal and mechanical parts
  • Chemical components
  • Electronic components
  • Industrial tools
Threats:
  • Infected workers
  • Security robots and drones
  • Moderate stardust contamination
  • Toxic waste hazards

Urban Ruins

The remains of a once-thriving city, now overrun with infected and hostile factions. Dangerous but rewarding for scavenging.

Key Locations:
  • Shopping Mall - Various consumer goods and supplies
  • Hospital - Medical supplies and equipment
  • Police Station - Weapons and ammunition
  • Apartment Blocks - Various household items and hidden caches
Resources:
  • Medical supplies
  • Weapons and ammunition
  • Electronics and batteries
  • Clothing and armor
Threats:
  • High concentration of infected
  • Hostile survivor factions
  • Collapsed buildings and structural hazards
  • Ambush points and traps

Stardust Crater

A high-level area centered around the main stardust impact site. Extremely dangerous but contains the most valuable resources in the game.

Key Locations:
  • Impact Zone - Highest concentration of stardust
  • Research Outpost - Advanced technology and data
  • Military Checkpoint - High-tier weapons and armor
  • Mutation Chamber - Unique abilities and upgrades
Resources:
  • Pure stardust crystals
  • Advanced technology components
  • Mutation catalysts
  • Experimental weapons
Threats:
  • Elite stardust aberrations
  • Military-grade security systems
  • Extreme radiation and contamination
  • Boss-level entities
Danger

Do not enter the Stardust Crater without proper protection gear and advanced weapons. Recommended level: 30+

Notable Points of Interest

Beyond the major regions, several unique locations offer special rewards and challenges:

Safe Havens:

  • Haven City - The largest survivor settlement, offering trading, quests, and faction headquarters
  • Outpost Network - Smaller settlements that provide safe zones and basic services
  • Nomad Camps - Temporary camps that move periodically, offering unique trades

Dungeons & Challenges:

  • Abandoned Bunkers - Underground facilities with valuable loot and tough enemies
  • Stardust Anomalies - Temporary events with unique rewards and dangers
  • Military Bases - Heavily defended locations with high-tier equipment
  • Research Laboratories - Contain advanced technology and story elements

Fast Travel System

Once Human features a fast travel network that becomes available as you explore:

How Fast Travel Works:

  1. Discover Fast Travel Points by exploring the map
  2. Activate each point by clearing enemies and interacting with the beacon
  3. Once activated, you can travel between any two discovered points
  4. Fast travel consumes a small amount of resources
  5. You cannot fast travel while in combat or when overencumbered

Fast Travel Point Types:

  • Settlement Beacons - Located in safe zones and settlements
  • Wilderness Outposts - Scattered throughout the open world
  • Emergency Transponders - Temporary points that must be repaired before use
Exploration Tip

Prioritize finding and activating fast travel points when entering a new region. This creates a safety net for exploration and makes resource gathering more efficient.

Boss Guides

Once Human features challenging boss encounters that require preparation, strategy, and skill to overcome. Here are guides for the major bosses in the game.

Boss Overview

Bosses in Once Human come in several categories:

  • Regional Bosses - Found in specific areas of the map
  • Story Bosses - Encountered during main quest progression
  • Event Bosses - Appear during special events or stardust storms
  • Hidden Bosses - Optional encounters requiring specific conditions to trigger

Most bosses drop unique loot, including rare weapons, armor, crafting materials, and blueprints. They also award significant experience and sometimes unlock new abilities or areas.

Boss Preparation

Before challenging any boss, ensure you're properly prepared:

General Preparation Checklist:

  • Research the boss's attack patterns and weaknesses
  • Bring appropriate weapons that exploit the boss's vulnerabilities
  • Stock up on healing items and combat buffs
  • Wear armor with resistances to the boss's damage types
  • Consider bringing allies for more challenging encounters
  • Set up a nearby respawn point if possible
Important

Most boss arenas prevent fast travel once the fight begins. Be prepared to either win or die - there's rarely an easy escape.

Major Boss Guides

Ravenous Hunter (Green Valley)

Ravenous Hunter Boss
Ravenous Hunter - a mutated creature that roams the farmlands of Green Valley.
Boss Information:
  • Location: Abandoned Farm Complex in Green Valley
  • Recommended Level: 15
  • Damage Type: Slashing, Blunt
  • Weaknesses: Fire, EMP
  • Resistances: Piercing, Cold
Attack Patterns:
  1. Blade Sweep - Horizontal attack with its sharp claws
  2. Thresher Charge - Rushes forward in a straight line
  3. Seed Spray - Launches explosive seed pods in an arc
  4. Ground Pound - Jumps and creates a shockwave on landing
Strategy:

Utilize the environment to your advantage, keeping distance and using obstacles to avoid its attacks:

  • Employ fire-based attacks to exploit its weakness
  • Target the exposed weak points on its body for critical hits
  • Use the silos in the arena as cover from the seed spray
  • Coordinate team dodges for the Thresher Charge and Ground Pound attacks
Phases:

Phase 1 (100-60% HP): Uses basic attacks and moves quickly.
Phase 2 (60-30% HP): Gains speed and adds the seed spray attack.
Phase 3 (Below 30% HP): Enters a frenzy state, increasing attack speed and damage.

Rewards:
  • Ravenous Hunter's Tooth - Crafting material for unique weapons
  • Hunter's Instinct - Passive skill that improves movement speed and agility
  • Claw of the Hunter - Unique melee weapon (rare drop)
  • Survival Expertise - Passive skill that improves health regeneration

Treant (Forest of Echoes)

Treant Boss
Treant - a sentient, ancient tree awakened by the stardust.
Boss Information:
  • Location: Heart of the Forest in Forest of Echoes
  • Recommended Level: 20
  • Damage Type: Blunt, Nature-based
  • Weaknesses: Fire, Lightning
  • Resistances: Piercing, Toxic
Attack Patterns:
  1. Root Slam - Slams roots into the ground, stunning players
  2. Leaf Storm - Creates a blinding, damaging storm of leaves
  3. Bark Shield - Temporarily shields itself, increasing resistance
Strategy:

Exploit the Treant's weaknesses with coordinated, elemental attacks:

  • Use fire and lightning attacks to deal significant damage
  • Avoid the area during Leaf Storm, utilizing the time for ranged attacks
  • Focus on destroying the roots to limit its mobility and attacks
  • When Bark Shield occurs, use area-of-effect attacks to destroy the shield
Phases:

Phase 1 (100-60% HP): Uses basic attacks and moves slowly.
Phase 2 (Below 60% HP): Activates Bark Shield periodically, requiring strategy adjustments.

Rewards:
  • Treant's Heartwood - Rare crafting material for nature-infused items
  • Forest's Blessing - Passive skill granting increased health regeneration in natural environments

Arachsiam (Caves of Erebo)

Arachsiam Boss
Arachsiam - a gargantuan, mutated spider dwelling within the Caves of Erebo.
Boss Information:
  • Location: Deepest Chamber in Caves of Erebo
  • Recommended Level: 25
  • Damage Type: Piercing, Toxic
  • Weaknesses: Fire, Explosives
  • Resistances: Blunt, Nature-based
Attack Patterns:
  1. Web Spray - Immobilizes players with sticky webs
  2. Poison Fang - Deals toxic damage with its fangs
  3. Egg Sac Explosion - Releases explosive, poisonous eggs
Strategy:

Utilize area control and explosive damage to counter Arachsiam's toxic threats:

  • Employ fire and explosive attacks to clear webs and deal massive damage
  • Destroy egg sacs before they explode, reducing damage taken
  • Coordinate team efforts to dodge the Poison Fang attack
  • Use the environment to your advantage, luring Arachsiam into traps or narrow spaces
Phases:

Phase 1 (100-50% HP): Uses basic attacks and moves slowly.
Phase 2 (Below 50% HP): Introduces Egg Sac Explosion, increasing environmental hazards.

Rewards:
  • Arachsiam's Venom - Rare crafting material for potent toxins
  • Spider's Agility - Passive skill granting increased movement speed in caves

Rabizex (Wasteland Frontier)

Rabizex Boss
Rabizex - a hulking, mutated beast roaming the Wasteland Frontier.
Boss Information:
  • Location: Radioactive Wastes in Wasteland Frontier
  • Recommended Level: 30
  • Damage Type: Blunt, Radiation
  • Weaknesses: Explosives, EMP
  • Resistances: Fire, Piercing
Attack Patterns:
  1. Radioactive Roar - Emits a damaging, radioactive shockwave
  2. Ground Stomp - Creates a massive shockwave, stunning players
  3. Nuclear Breath - Unleashes a stream of radioactive energy
Strategy:

Counter Rabizex's brute force with strategic use of explosives and environmental hazards:

  • Utilize explosives to stun and deal massive damage
  • Lure Rabizex into radioactive pools, increasing its damage taken
  • Coordinate team dodges for the Ground Stomp and Nuclear Breath attacks
  • Use the environment to your advantage, exploiting Rabizex's slow movement
Phases:

Phase 1 (100-60% HP): Uses basic attacks and moves slowly.
Phase 2 (Below 60% HP): Unleashes Nuclear Breath, significantly increasing damage output.

Rewards:
  • Rabizex's Hide - Rare crafting material for radiation-resistant gear
  • Rad Resistance - Passive skill granting increased resistance to radiation

Mensdevoran (The Abyss)

Mensdevoran Boss
Mensdevoran - the final, most terrifying Great One, residing within The Abyss.
Boss Information:
  • Location: The Abyss's Core Chamber
  • Recommended Level: 40
  • Damage Type: Reality Warping, Energy
  • Weaknesses: Stardust-infused weapons, Reality Anchors
  • Resistances: Most conventional damage types
Attack Patterns:
  1. Reality Distortion - Warps reality, creating illusions and hazards
  2. Energy Vortex - Pulls players in with a devastating energy vortex
  3. Void Blast - Unleashes a powerful, reality-warping blast
Strategy:

Conquer Mensdevoran by mastering reality-warping mechanics and exploiting its weaknesses:

  • Utilize Stardust-infused weapons and Reality Anchors to stabilize reality
  • Coordinate team efforts to avoid the Energy Vortex's pull
  • Destroy reality distortions to reduce environmental hazards
  • When Void Blast occurs, take cover behind nearby objects to avoid damage
Phases:

Phase 1 (100-70% HP): Uses basic attacks and moves slowly.
Phase 2 (70-40% HP): Introduces Void Blast, significantly increasing damage output.
Phase 3 (Below 40% HP): All abilities become more frequent and intense.

Rewards:
  • Mensdevoran's Essence - Legendary crafting material
  • Reality Mastery - Passive skill that allows limited reality manipulation

Siren (The Mire)

Siren Boss
Siren - a mysterious, aquatic entity luring victims into The Mire.
Boss Information:
  • Location: The Mire's Depths
  • Recommended Level: 35
  • Damage Type: Aquatic, Sonic
  • Weaknesses: Electricity, Explosives
  • Resistances: Piercing, Nature-based
Attack Patterns:
  1. Siren's Call - Lures players with a mesmerizing, damaging song
  2. Tidal Wave - Creates a massive, destructive wave
  3. Aquatic Swarm - Summons a swarm of deadly, aquatic creatures
Strategy:

Counter Siren's aquatic threats with electric and explosive countermeasures:

  • Utilize electric attacks to disrupt Siren's Call and stun the boss
  • Employ explosives to clear the Aquatic Swarm and deal massive damage
  • Coordinate team dodges for the Tidal Wave attack
  • Use the environment to your advantage, exploiting Siren's limited mobility on land
Phases:

Phase 1 (100-60% HP): Uses basic attacks and moves slowly.
Phase 2 (Below 60% HP): Unleashes Tidal Wave, significantly increasing environmental hazards.

Rewards:
  • Siren's Voice - Rare crafting material for sonic weapons
  • Aquatic Adaptation - Passive skill granting increased movement speed in water

Monolith Boss 1 (Location)

Main Quests & Side Missions

Once Human features a rich narrative with main story quests and numerous side missions. This section provides an overview of the quest structure and tips for key missions.

Main Quest Line

The main story of Once Human follows your character's journey to understand the stardust phenomenon and your own mysterious connection to it. The quest line is divided into chapters:

Chapter 1: Awakening

The beginning of your journey as you awaken in the post-apocalyptic world with no memory of your past.

Key Quests:
  • First Steps - Tutorial quest to learn basic survival
  • Echoes of Memory - Discover clues about your identity
  • Safe Haven - Find the first survivor settlement
  • The Signal - Investigate a mysterious broadcast
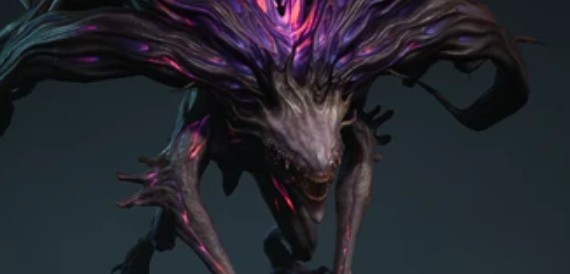
  • Harvester's Domain - Confront the first boss
Rewards:
  • Basic crafting blueprints
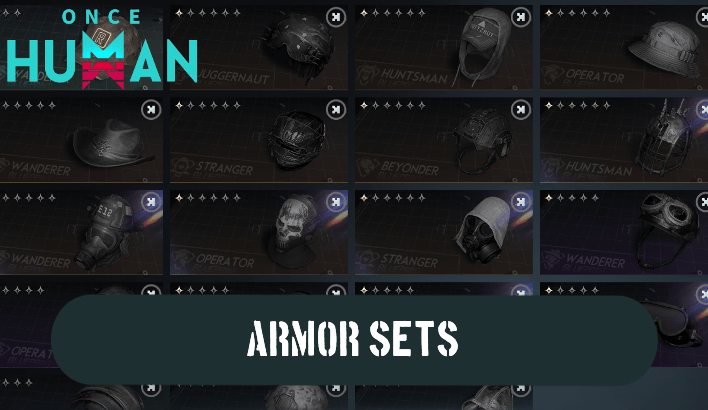
  • First set of specialized equipment
  • Access to Green Valley region
  • First mutation ability

Chapter 2: The Old World

Explore the remnants of civilization and discover the events that led to the catastrophe.

Key Quests:
  • Industrial Secrets - Investigate the abandoned factories
  • Power Struggle - Restore power to key facilities
  • Data Recovery - Retrieve crucial information from secure servers
  • Mechanical Menace - Track down the source of hostile robots
  • System Override - Confront the Overseer
Rewards:
  • Advanced crafting blueprints
  • Access to Industrial Zone
  • Vehicle parts for transportation
  • Enhanced mutation abilities

Chapter 3: Fractured Humanity

Navigate the complex politics of survivor factions and confront the darker side of human nature.

Key Quests:
  • Urban Exploration - Navigate the dangerous city ruins
  • Faction Wars - Choose sides in a territorial conflict
  • The Cure - Search for a rumored treatment for stardust infection
  • Patient Zero - Track down the source of a new mutation
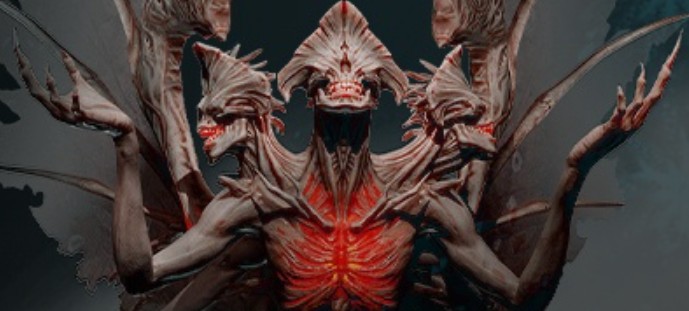
  • Hospital Horror - Confront the Amalgamation
Rewards:
  • Faction-specific equipment and abilities
  • Access to Urban Ruins
  • Advanced mutation control
  • Base expansion blueprints

Chapter 4: Cosmic Truth

Discover the true nature of the stardust phenomenon and your connection to it.

Key Quests:
  • Edge of Reality - Prepare to enter the Stardust Crater
  • Beyond Humanity - Embrace or resist your evolving nature
  • The Source - Reach the center of the impact zone
  • Cosmic Revelation - Learn the truth about the stardust
  • The Final Design - Confront the Architect
Rewards:
  • Endgame equipment and abilities
  • Access to Stardust Crater
  • Complete mutation control
  • Choice of multiple endings
Story Tip

Your choices throughout the main quest will affect the final chapter and determine which ending you receive. There are three major endings with several variations based on your decisions.

Notable Side Missions

Side missions in Once Human provide additional story context, unique rewards, and special challenges. Here are some of the most rewarding side mission chains:

The Archivist's Collection

A series of missions to recover lost knowledge and artifacts from the old world. Found in Haven City by speaking with the Archivist.

Rewards: Unique crafting blueprints, special equipment, and access to the Archives (a special vendor with rotating inventory).

Wasteland Courier

Deliver important packages between settlements, facing various challenges along the way. Starts at any Outpost Network location.

Rewards: Movement speed bonuses, reduced fast travel costs, and special courier equipment.

Hunter's Challenge

Track and hunt special mutated creatures across all regions. Given by the Master Hunter in Green Valley.

Rewards: Unique hunting weapons, special crafting materials, and the ability to tame certain creatures.

Technological Wonders

Help a scientist recover and restore advanced technology. Found in the Research Outpost in Industrial Zone.

Rewards: High-tech gadgets, special weapon modifications, and access to experimental technology.

Quest Tip

Many side missions are time-limited or become unavailable after certain main story events. Check your journal regularly for missions marked with a clock icon, as these have time constraints.

Daily & Weekly Challenges

Once Human features rotating daily and weekly challenges that provide resources, experience, and special rewards:

Daily Challenges:

  • Resource Gathering - Collect specific resources
  • Enemy Elimination - Defeat certain enemy types
  • Exploration - Discover new locations
  • Crafting - Create specific items

Weekly Challenges:

  • Boss Hunt - Defeat specific bosses
  • Stardust Anomaly - Complete special event missions
  • Faction Operations - Complete tasks for your chosen faction
  • Survival Challenge - Complete difficult survival scenarios

Access daily and weekly challenges from the Challenge Board in any major settlement or from your journal menu.

Factions & NPCs

The world of Once Human is populated by various factions with their own agendas, territories, and relationships. Understanding these factions is crucial for navigating the social landscape and accessing unique rewards.

Major Factions

The Restoration

The Restoration

A faction dedicated to rebuilding civilization as it was before the catastrophe. They focus on recovering technology, maintaining order, and restoring infrastructure.

HQ: Haven City
The Evolutionists

The Evolutionists

Embrace the stardust as the next step in human evolution. They experiment with controlled mutation and seek to harness its power rather than fear it.

HQ: Mutation Labs
The Purifiers

The Purifiers

Religious zealots who view the stardust as a divine punishment. They seek to cleanse the world of its influence and return to a simpler way of life.

HQ: Sanctuary
The Scavengers

The Scavengers

Loosely organized groups that prioritize survival above all else. They control key resource areas and trade with all other factions when beneficial.

HQ: Various Outposts

Faction Reputation System:

Your standing with each faction is tracked on a scale from Hostile to Exalted:

  1. Hostile - Faction members will attack on sight
  2. Unfriendly - Limited interaction, high prices at vendors
  3. Neutral - Basic interaction and trading
  4. Friendly - Access to faction quests and better prices
  5. Honored - Access to special equipment and base locations
  6. Exalted - Full access to all faction benefits and unique rewards

Reputation is gained by completing faction quests, trading with faction vendors, and helping faction members in the world. Some actions for one faction may decrease your standing with opposing factions.

Faction Conflicts

The Restoration and Evolutionists are in direct conflict, as are the Purifiers and Evolutionists. Reaching high reputation with one faction will limit how far you can progress with their rivals.

Key NPCs

Throughout your journey, you'll encounter important characters who provide quests, information, and services:

Faction Leaders

  • Commander Hayes - Leader of the Restoration. Former military officer who believes in rebuilding society with strong leadership and order.
  • Dr. Eliza Morgan - Leader of the Evolutionists. Brilliant scientist who sees stardust as the key to humanity's future evolution.
  • Elder Thaddeus - Leader of the Purifiers. Charismatic religious figure who views the catastrophe as divine judgment.
  • Rook - De facto leader of the Scavengers. Pragmatic survivor who built a network of traders and scouts.

Each leader offers unique main quests that advance their faction's storyline and provide special rewards. Your choices when interacting with them will shape the world and your character's development.

Merchants & Crafters

  • Marcus the Weaponsmith - Specializes in high-quality weapons. Located in Haven City.
  • Sera the Alchemist - Sells medical supplies and chemical components. Found in the Research Outpost.
  • Old Man Jenkins - Trades rare artifacts and collectibles. Moves between settlements.
  • The Twins - Armor specialists who offer unique protective gear. Located in Sanctuary.
  • Whisper - Black market dealer who sells illegal and experimental items. Hidden location that changes weekly.

Building reputation with merchants through regular trading and completing their personal quests will unlock special inventory items and better prices.

Quest Givers

  • The Archivist - Elderly scholar collecting knowledge and artifacts from the old world.
  • Master Hunter Vex - Expert tracker who offers hunting challenges and survival training.
  • Dr. Nakamura - Scientist researching stardust effects on the environment and creatures.
  • Courier Chief Mira - Organizes the wasteland courier network and delivery missions.
  • The Stranger - Mysterious figure who appears at key moments with cryptic guidance.

These NPCs offer some of the most rewarding side quest chains in the game. Complete their initial quests to unlock more challenging and lucrative missions.

Companions

Throughout your journey, you can recruit companions who will assist you in combat and exploration:

  • Ash - Former military scout with excellent ranged combat skills. Found in Green Valley.
  • Gears - Mechanical genius who can repair equipment and hack security systems. Found in Industrial Zone.
  • Luna - Mysterious woman with limited stardust manipulation abilities. Found in Urban Ruins.
  • Rex - Mutated canine companion with tracking and combat abilities. Found during a special side quest.

Each companion has their own personal quest line that reveals their backstory and unlocks their full potential. Companions also have unique opinions about factions and may approve or disapprove of your choices.

Companion Tip

You can only have one active companion at a time, but you can switch between them at your base. Make sure to equip your companions with appropriate gear to maximize their effectiveness.

Advanced Strategies

Once you've mastered the basics of Once Human, these advanced strategies will help you optimize your gameplay and tackle the most challenging content.

Character Build Optimization

As you progress, you'll gain access to various skills, mutations, and equipment that can be combined into specialized builds:

Popular Build Archetypes:

  • Tank - Focus on health, armor, and damage reduction to absorb hits
  • DPS - Maximize damage output through critical hits and attack speed
  • Support - Healing, buffs, and crowd control abilities
  • Stealth - Sneak attacks, critical damage, and evasion
  • Mutation Specialist - Harness stardust abilities for unique powers

Skill Point Allocation:

The skill tree in Once Human is divided into five branches:

  • Survival - Resource gathering, crafting efficiency, and environmental resistance
  • Combat - Weapon proficiency, damage output, and combat techniques
  • Agility - Movement speed, stamina management, and evasion
  • Technology - Advanced crafting, hacking, and gadget usage
  • Mutation - Stardust resistance and special abilities

For optimal builds, focus on two primary branches that complement each other, with minimal points in others for essential skills.

Build Tip

You can respec your skill points at any major settlement for a resource cost. Experiment with different builds to find what works best for your playstyle.

Efficient Resource Management

Managing your resources effectively is crucial for long-term success:

Resource Prioritization:

  • Focus on renewable resources for sustainable crafting
  • Set up automated resource gathering at your base
  • Create specialized storage for different resource types
  • Establish trade routes with settlements for resources you can't easily gather

Advanced Base Features:

  • Automated Farms - Sustainable food production
  • Water Purification System - Unlimited clean water
  • Resource Extractors - Passive gathering of nearby resources
  • Recycling Station - Break down unwanted items into components
  • Power Grid - Connect and power multiple base modules

Inventory Management:

  • Use the sorting system to organize items by type
  • Create loadouts for different activities (exploration, combat, gathering)
  • Regularly recycle or sell low-value items
  • Store bulk resources at your base rather than carrying them

Endgame Content

After completing the main story, several challenging activities become available:

Stardust Anomalies:

Temporary events that appear randomly across the map, featuring unique challenges and rewards. Anomalies are rated from Tier 1 (easiest) to Tier 5 (hardest) and require coordinated group effort at higher levels.

Mutation Trials:

Special challenge dungeons that test specific skills and reward powerful mutation abilities. Each trial has different objectives and environmental hazards.

Faction Warfare:

High-level PvP and PvE content where factions compete for control of territories and resources. Participating grants faction-specific rewards and global benefits.

The Architect's Labyrinth:

A procedurally generated dungeon that changes weekly, featuring increasingly difficult challenges and rare rewards. The Labyrinth has 50 levels, with a guaranteed legendary item for completing level 50.

Endgame Warning

Endgame content is designed for fully geared characters with optimized builds. Make sure to have appropriate equipment and consumables before attempting these challenges.

PvP Strategies

Player versus Player combat in Once Human occurs in designated zones and during faction warfare events:

PvP Zones:

  • Contested Territories - Areas with valuable resources where PvP is always enabled
  • Faction Outposts - Capturable locations that provide benefits to the controlling faction
  • The Wasteland Arena - Dedicated PvP area with structured matches and tournaments

PvP Tips:

  • Use terrain and cover to your advantage
  • Carry status-clearing consumables to counter debuffs
  • Learn to dodge-roll effectively to avoid damage
  • Use stealth and ambush tactics when outnumbered
  • Coordinate with faction members for group tactics
  • Consider specialized PvP gear with player damage bonuses

PvP Rewards:

    Starchrom
  • This is the primary currency earned through PvP events
  • Echo Stones / Territory Purification
  • These PvP-driven events grant Starchrom when you successfully purify the Chaos Cortex or complete a Territory Purification
  • Event Echo Stones often trigger Chaos State and lead to contested areas or base defense, with Starchrom as the reward
    • Stronghold / Warband Season
  • Participating in these large-scale PvP/GvG engagements can yield the following
  • Season-end rewards, including rank-based Starchrom and potentially cosmetics
  • However, some players have noted that the only actual tangible reward has been limited to Starchrom for gacha, with cosmetic elements being phased out
    • Loot Crates (Legacy of Conflict)
  • In faction-based PvP scenarios like Prismverse’s Clash
  • Winning your faction earns you 9 Legacy of Conflict loot crates, while the losing faction receives 6. These crates (contents still unknown) may include cosmetics, blueprints, or Starchrom
  • Frequently Asked Questions

    How do I increase my inventory space?

    You can increase inventory capacity through these methods:

    • The backpack capacity can be increased by crafting backpack expansions or by using consumables, gear, and vehicles that provide carry weight buffs.
    • Backpack expansion sizes vary (40, 60, or 80 weight) and are crafted using different materials.
    • Additionally, optimizing inventory management, utilizing storage chests, and employing transportation methods like vehicles can help with managing inventory weight.

    What happens when I die?

    When you die in Once Human:

    • You respawn at your last activated respawn point (bed, outpost, or checkpoint)
    • You drop a backpack containing some of your inventory items at the location of death
    • You have a limited time to retrieve your backpack before it becomes lootable by other players (in PvP zones)
    • You suffer a temporary "Recovery" debuff that reduces your stats slightly for 10 minutes

    The severity of death penalties can be reduced through the "Quick Recovery" skill in the Survival tree.

    How do mutations work?

    Mutations are special abilities gained through exposure to stardust

    • Initial mutations are unlocked through main story progression
    • Additional mutations can be found by exploring stardust-contaminated areas
    • Each mutation has three tiers of power, with increasing benefits
    • You can have up to three active mutations at once (upgradeable to five with skills)

    Mutations range from passive benefits

  • Stardust Resistance – reduces sanity loss or damage when in contaminated areas
  • Night Vision / Enhanced Vision – lets you see better in dark or contaminated zones
  • Metabolic Enhancements – slower hunger/thirst drain, faster stamina recovery, higher max HP
  • Can I reset my skill points or faction reputation?

    Under Construction This section is under construction.

    What's the best way to earn resources quickly?

    For efficient resource gathering:

    • Set up Resource Extractors at your base in resource-rich areas
    • Complete daily and weekly challenges for resource rewards
    • Focus on high-yield resource nodes marked on your map after scanning
    • Join or form resource gathering groups for efficiency and protection
    • Trade with NPCs for resources you struggle to find
    • Explore Stardust Anomalies for rare resources

    Different regions specialize in different resources, so plan your gathering expeditions accordingly.